Go 腳手架:使用 osbuilder 生成標準化 Dockerfile,并自動構建鏡像
當前企業應用的部署形態基本都是采用云原生的方式來部署。所謂的云原生部署方式,就是指將服務構建成一個容器鏡像,并使用 Kubernetes 進行部署。
在將服務構建成容器鏡像時,不僅需要編寫 Dockerfile,還需要執行 docker命令基于 Dockerfile 和編譯產物來構建出最終的鏡像。
本文就來詳細介紹下 osbuilder 腳手架,是如何生成符合最佳實踐、標準的 Dockerfile,并支持 make image命令,來構建出容器鏡像的。

一、Dockerfile 最佳實踐
在我的公眾號文章 Dockerfile 最佳實踐,我詳細介紹了如何編寫符合最佳實踐的 Dockerfile。如果你使用 osbuilder 工具生成項目,osbuilder 工具會為你自動生成符合最佳實踐的 Dockerfile 文件。
二、使用 osbuilder 工具生成 Dockerfile
首先需要安裝 osbuilder 工具。安裝命令如下:
$ go install github.com/onexstack/osbuilder/cmd/osbuilder@latest
$ osbuilder version
接下來只需要執行以下幾步,便可以生成能夠根據需求生成符合最佳實踐的 Dockerfile,并能構建出鏡像。
步驟 1:編寫項目配置文件
項目的配置文件如下(保存在 /tmp/osdemo.yaml 文件中):
scaffold: osbuilder
version: v0.0.16
metadata:
  # 選擇二進制文件的部署形式。當前已支持systemd。未來會支持docker、kubernetes,會生產Dockerfile、Kubernetes YAML 等資源
  deploymentMethod: kubernetes
  image:
    # 當指定 deploymentMethod 為 docker、kubernetes 時,構建鏡像的地址
    registry: docker.io
    # 指定 Dockerfile 的生成模式。可選的模式有:
    # - none:不生成 Dockerfile。需要自行實現 build/docker/<component_name>/Dockerfile 文件;
    # - runtime-only:僅包含運行時階段(適合已有外部構建產物),適合本地調試;
    # - multi-stage:多階段構建(builder + runtime);
    # - combined:同時生成 multi-stage、runtime-only 2 種類型的 Dockerfile:
    #   - multi-stage:Dockerfile 名字為 Dockerfile
    #   - runtime-only:Dockerfile 名字為 Dockerfile.runtime-only
    dockerfileMode: combined
    # 是否采用 distroless 運行時鏡像。如果不采用會使用 debian 基礎鏡像,否則使用 gcr.io/distroless/base-debian12:nonroot
    # - true:采用 gcr.io/distroless/base-debian12:nonroot 基礎鏡像。生產環境建議設置為 true;
    # - false:采用 debian:bookworm 基礎鏡像。測試環境建議設置為 fasle;
    distroless: true
  # 控制 Makefile 的生成方式。當前支持以下 3 種:
  # - none:不生成 makefile
  # - structured:生成單個 makefile
  # - unstructured:生成結構化的 makefile
  makefileMode: unstructured
  # 項目創建者名字,用于生成版權信息
  author: 孔令飛
  # 項目創建者郵箱,用于生成版權信息
  email: colin404@foxmail.com
# osbuilder 支持多種應用類型。當前僅支持 Web 服務類型
# 未來會支持:異步任務 Job 類型、命令行工具類型、聲明式API服務器類型
webServers:
  - binaryName: os-apiserver
    # Web Server 使用的框架。當前支持 gin、grpc
    # 未來會支持kratos、grpc-gateway、go-zero、kitex、hertz等
    webFramework: grpc
    # Web Server 后端使用的存儲類型。當前支持 memory、mysql
    # 未來會支持etcd、redis、sqlite、mongo、postgresql
    storageType: memory
    # 是否添加健康檢查接口
    withHealthz: true
    # 是否添加用戶默認,開啟后,有完整的認證、鑒權流程
    withUser: false
    # 是否生成注冊/反注冊到騰訊北極星服務中心的代碼
    withPolaris: false
上面的配置文件中,我們進行了以下配置:
image:
    # 當指定 deploymentMethod 為 docker、kubernetes 時,構建鏡像的地址
    registry: docker.io
    # 指定 Dockerfile 的生成模式。可選的模式有:
    # - none:不生成 Dockerfile。需要自行實現 build/docker/<component_name>/Dockerfile 文件;
    # - runtime-only:僅包含運行時階段(適合已有外部構建產物),適合本地調試;
    # - multi-stage:多階段構建(builder + runtime);
    # - combined:同時生成 multi-stage、runtime-only 2 種類型的 Dockerfile:
    #   - multi-stage:Dockerfile 名字為 Dockerfile
    #   - runtime-only:Dockerfile 名字為 Dockerfile.runtime-only
    dockerfileMode: combined
    # 是否采用 distroless 運行時鏡像。如果不采用會使用 debian 基礎鏡像,否則使用 gcr.io/distroless/base-debian12:nonroot
    # - true:采用 gcr.io/distroless/base-debian12:nonroot 基礎鏡像。生產環境建議設置為 true;
    # - false:采用 debian:bookworm 基礎鏡像。測試環境建議設置為 fasle;
distroless: true- registry:用來配置鏡像的倉庫地址;
- dockerfileMode:用來配置鏡像的模式:
- multi-stage:Dockerfile 名字為 Dockerfile
- runtime-only:Dockerfile 名字為 Dockerfile.runtime-only
- none:不生成 Dockerfile。需要自行實現 build/docker/<component_name>/Dockerfile 文件;
- runtime-only:僅包含運行時階段(適合已有外部構建產物),適合本地調試;
- multi-stage:多階段構建(builder + runtime);
- combined:同時生成 multi-stage、runtime-only 2 種類型的 Dockerfile:
- distroless:用來控制是否使用 distroless 基礎鏡像。生產環境建議使用 distroless 鏡像。測試環境為了排障方便,可以不適用 distroless 鏡像。
步驟 2:生成項目
執行以下命令生成項目:
$ osbuilder create project -c /tmp/osdemo.yaml osdemo步驟 3:生成 REST 資源
$ cd osdemo
$ osbuilder create api --kinds cron_job,job -b os-apiserver
步驟 4:構建 Docker 鏡像
在生成的 osdemo 項目中,已經為 os-apiserver 組件生成了 Dockerfile,位于 build/docker/os-apiserver/目錄下:
$ ls build/docker/os-apiserver
Dockerfile Dockerfile.runtime-only- Dockerfile 使用多階段構建的方式來構建鏡像,在 builder 鏡像中,編譯 Go 源碼;
- Dockerfile.runtime-only:在本地編譯源碼,并被 COPY 到鏡像中,適合本地調試。
這里,我們執行以下命令來構建鏡像:
$ make protoc # 編譯 os-apiserver 的 Protobuf 文件
$ go mod tidy # 下載缺失的依賴包
$ go generate ./... # 生成代碼(依賴注入)
$ make image RUNTIME_ONLY=1 # 現在本地編譯源碼,產出二進制文件,再COPY 到鏡像中。
===========> Building binary os-apiserver v0.0.15 for linux amd64
===========> Building docker image os-apiserver v0.0.15 for linux_amd64
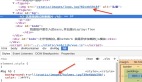
[+] Building 3.3s (16/16) FINISHED
... 0.0s
=> => naming to docker.io/osdemo/os-apiserver:v0.0.0可以看到,上述命令成功構建出了 docker.io/osdemo/os-apiserver:v0.0.0鏡像,執行以下命令運行鏡像:
$ docker run docker.io/osdemo/os-apiserver:v0.0.0
WARNING: proto: file "auth.proto" is already registered
See https://protobuf.dev/reference/go/faq#namespace-conflict

I1013 12:18:13.514143       7 server.go:66] "Initializing database connection" type="memory"
I1013 12:18:13.515584       7 grpc_server.go:62] "Start to listening the incoming requests" protocol="grpc" addr="[::]:6666"
可以看到,我們可以成功運行鏡像。如果你想使用多階段構建,可以執行以下命令:
$ make image三、osbuilder 工具生成的 Dockerfile 文件
osbuilder 可以自動生成 4 種類型的 Dockerfile 文件:
(1) 使用 distroless 鏡像,本地編譯后 COPY 到鏡像中,適合本地測試,Dockerfile 如下:
# syntax=docker/dockerfile:1.7

# 0) Build args (overridable in CI)
ARG BUILDER_IMAGE=alpine:3.20
ARG RUNTIME_IMAGE=gcr.io/distroless/base-debian12:nonroot
ARG UID=65532
ARG GID=65532

# 1) Use a lightweight builder image with package manager to fetch tini.
# builder stage does not compile go source files.
FROM ${BUILDER_IMAGE} AS builder

# Work directory
WORKDIR /workspace

# Install minimal tools required to download files securely
RUN apk add --no-cache curl ca-certificates

# Download the static tini binary (example for amd64); use a different file for other architectures
# Then make it executable so it can be used as PID 1 in the final image
RUN curl -fsSL -o /usr/bin/tini https://github.com/krallin/tini/releases/download/v0.19.0/tini-static-amd64 \
 && chmod +x /usr/bin/tini

# 2) Runtime stage
FROM ${RUNTIME_IMAGE} AS runtime

ARG OS
ARG ARCH
ARG UID
ARG GID

# App directory
WORKDIR /app

# Copy artifact and set ownership; numeric UID:GID is more robust
COPY --from=builder --chown=0:0 /usr/bin/tini /usr/bin/tini
COPY --chown=${UID}:${GID} _output/platforms/${OS}/${ARCH}/os-apiserver /app/os-apiserver

# Security: run as non-root
USER ${UID}:${GID}

# Use tini as minimal init to handle signals and reap zombies
ENTRYPOINT ["/usr/bin/tini", "--", "/app/os-apiserver"]
(2) 使用 distroless 鏡像,并使用多階段構建,Dockerfile 如下:
# syntax=docker/dockerfile:1.7

# 0) Build args (overridable in CI)
ARG BUILDER_IMAGE=golang:1.25.0
ARG RUNTIME_IMAGE=gcr.io/distroless/base-debian12:nonroot
ARG UID=65532
ARG GID=65532

# 1) Builder stage
FROM ${BUILDER_IMAGE} AS builder

ARG OS
ARG ARCH

# Optional: install build-time tools (as needed)
# RUN apt-get update && apt-get install -y --no-install-recommends upx && rm -rf /var/lib/apt/lists/*

# Work directory
WORKDIR /workspace

# Install minimal tools required to download files securely
RUN apk add --no-cache curl ca-certificates

# Download the static tini binary (example for amd64); use a different file for other architectures
# Then make it executable so it can be used as PID 1 in the final image
RUN curl -fsSL -o /usr/bin/tini https://github.com/krallin/tini/releases/download/v0.19.0/tini-static-amd64 \
 && chmod +x /usr/bin/tini

# Use Go modules cache - The most important cache optimization
# Copy go.mod and go.sum first to leverage Docker layer cache
COPY go.mod go.sum ./

# Use cache mount to cache Go modules
RUN --mount=type=cache,target=/go/pkg/mod \
 --mount=type=cache,target=/root/.cache/go-build \
 go mod download

# Copy source code
COPY . .

# Go build parameters (enable CGO if your project needs static linking)
ENV CGO_ENABLED=1 GOOS=${OS} GOARCH=${ARCH} GO111MODULE=on GOCACHE=/root/.cache/go-build GOMODCACHE=/go/pkg/mod

# Build with cache mount for make build
RUN --mount=type=cache,target=/go/pkg/mod \
    --mount=type=cache,target=/root/.cache/go-build \
    make build BINS=os-apiserver

# 2) Runtime stage
FROM ${RUNTIME_IMAGE} AS runtime

ARG OS
ARG ARCH
ARG UID
ARG GID

# App directory
WORKDIR /app

# Copy artifacts and set ownership; numeric UID:GID is more robust
COPY --from=builder --chown=0:0 /tmp/tini /usr/bin/tini
COPY --from=builder --chown=${UID}:${GID} /workspace/_output/platforms/linux/amd64/os-apiserver /app/os-apiserver

# Security: run as non-root
USER ${UID}:${GID}

# Use tini as minimal init to handle signals and reap zombies
ENTRYPOINT ["/usr/bin/tini", "--", "/app/os-apiserver"]
(3) 不使用 distroless 鏡像,本地編譯后 COPY 到鏡像中,適合本地測試,Dockerfile 如下:
# syntax=docker/dockerfile:1.7

# 0) Build args (overridable in CI)
ARG BUILDER_IMAGE=alpine:3.20
ARG RUNTIME_IMAGE=debian:bookworm
ARG USER=noroot
ARG UID=65532
ARG GID=65532

# 1) Use a lightweight builder image with package manager to fetch tini.
# builder stage does not compile go source files.
FROM ${BUILDER_IMAGE} AS builder

# Work directory
WORKDIR /workspace

# Install minimal tools required to download files securely
RUN apk add --no-cache curl ca-certificates

# Download the static tini binary (example for amd64); use a different file for other architectures
# Then make it executable so it can be used as PID 1 in the final image
RUN curl -fsSL -o /usr/bin/tini https://github.com/krallin/tini/releases/download/v0.19.0/tini-static-amd64 \
 && chmod +x /usr/bin/tini

# 2) Runtime stage
FROM ${RUNTIME_IMAGE} AS runtime

ARG OS
ARG ARCH
ARG USER
ARG UID
ARG GID

# App directory
WORKDIR /app

# Install runtime essentials
RUN apt-get update \
 && apt-get install -y --no-install-recommends ca-certificates tzdata wget curl telnet \
 && rm -rf /var/lib/apt/lists/*

# Security: create a non-root user (ignore if it already exists)
# Use || true to prevent build failures if the group/user already exists in the base image
RUN groupadd -g ${GID} ${USER} 2>/dev/null || true \
 && useradd -u ${UID} -g ${USER} ${USER} 2>/dev/null || true

# Copy artifact and set ownership; numeric UID:GID is more robust
COPY --from=builder --chown=0:0 /usr/bin/tini /usr/bin/tini
COPY --chown=${UID}:${GID} _output/platforms/${OS}/${ARCH}/os-apiserver /app/os-apiserver

# Security: run as non-root
USER ${UID}:${GID}

# Use tini as minimal init to handle signals and reap zombies
ENTRYPOINT ["/usr/bin/tini", "--", "/app/os-apiserver"]
(4) 不使用 distroless 鏡像,并使用多階段構建,Dockerfile 如下:
# syntax=docker/dockerfile:1.7

# 0) Build args (overridable in CI)
ARG BUILDER_IMAGE=golang:1.25.0
ARG RUNTIME_IMAGE=debian:bookworm
ARG USER=noroot
ARG UID=65532
ARG GID=65532

# 1) Builder stage
FROM ${BUILDER_IMAGE} AS builder

ARG OS
ARG ARCH

# Optional: install build-time tools (as needed)
# RUN apt-get update && apt-get install -y --no-install-recommends upx && rm -rf /var/lib/apt/lists/*

# Work directory
WORKDIR /workspace

# Install minimal tools required to download files securely
RUN apk add --no-cache curl ca-certificates

# Download the static tini binary (example for amd64); use a different file for other architectures
# Then make it executable so it can be used as PID 1 in the final image
RUN curl -fsSL -o /usr/bin/tini https://github.com/krallin/tini/releases/download/v0.19.0/tini-static-amd64 \
 && chmod +x /usr/bin/tini

# Use Go modules cache - The most important cache optimization
# Copy go.mod and go.sum first to leverage Docker layer cache
COPY go.mod go.sum ./

# Use cache mount to cache Go modules
RUN --mount=type=cache,target=/go/pkg/mod \
 --mount=type=cache,target=/root/.cache/go-build \
 go mod download

# Copy source code
COPY . .

# Go build parameters (enable CGO if your project needs static linking)
ENV CGO_ENABLED=1 GOOS=${OS} GOARCH=${ARCH} GO111MODULE=on GOCACHE=/root/.cache/go-build GOMODCACHE=/go/pkg/mod

# Build with cache mount for make build
RUN --mount=type=cache,target=/go/pkg/mod \
    --mount=type=cache,target=/root/.cache/go-build \
    make build BINS=os-apiserver

# 2) Runtime stage
FROM ${RUNTIME_IMAGE} AS runtime

ARG OS
ARG ARCH
ARG USER
ARG UID
ARG GID

# App directory
WORKDIR /app
# Install runtime essentials
RUN apt-get update \
 && apt-get install -y --no-install-recommends ca-certificates tzdata wget curl telnet \
 && rm -rf /var/lib/apt/lists/*

# Security: create a non-root user (ignore errors if already exists)
# Use || true to avoid build failures when the group/user already exists in base image
RUN groupadd -g ${GID} ${USER} 2>/dev/null || true \
 && useradd -u ${UID} -g ${USER} ${USER} 2>/dev/null || true

# Copy artifacts and set ownership; numeric UID:GID is more robust
COPY --from=builder --chown=0:0 /tmp/tini /usr/bin/tini
COPY --from=builder --chown=${UID}:${GID} /workspace/_output/platforms/linux/amd64/os-apiserver /app/os-apiserver

# Security: run as non-root
USER ${UID}:${GID}

# Use tini as minimal init to handle signals and reap zombies
ENTRYPOINT ["/usr/bin/tini", "--", "/app/os-apiserver"]
四、總結
本篇文章介紹了如何使用 osbuilder 生成符合 Dockerfile 最佳實踐的 Dockerfile,并生成 image Makefile規則構建鏡像。