從 0 到 1 實現基于 Docker 的深度學習環境的安裝與配置!
在當今人工智能技術飛速發展的時代,深度學習作為核心驅動力之一,正引領著科研與產業界的革新。搭建一個高效、可靠的深度學習環境對于開發者和研究人員來說,是最基本的需求。
本文筆者將從0到1實現基于Docker的深度學習環境的安裝與配置!與大家分享~
本文中的方法,可用于Nvidia顯卡及常見硬件,如:A100服務器、RTX4090家用顯卡。 操作系統以Ubuntu為例。

一、安裝Ubuntu操作系統
安裝Ubuntu的流程和以往并沒有太大不同,依舊是老生常談的三步曲:下載鏡像、制作啟動盤、安裝系統。
1.下載合適的Ubuntu鏡像
首先訪問Ubuntu官方網站,下載所需要的系統版本:
- 桌面版:https://releases.ubuntu.com/22.04/ubuntu-22.04-desktop-amd64.iso
- 服務器版:https://releases.ubuntu.com/22.04/ubuntu-22.04-live-server-amd64.iso
其中,服務器版適合于不需要圖形界面的服務器環境,或者構建高度定制化的系統。它更側重于性能優化、遠程管理以及自動化運維,適合云服務器部署、容器化應用、數據庫服務器等場景。桌面版提供了完整的圖形用戶界面(GUI),適合日常使用、開發環境搭建及需要直接交互的工作站。它預裝了許多日常所需的軟件和實用工具,以及對各種硬件的良好支持,包括自動安裝大部分驅動程序,這對于筆記本電腦用戶尤為便利。
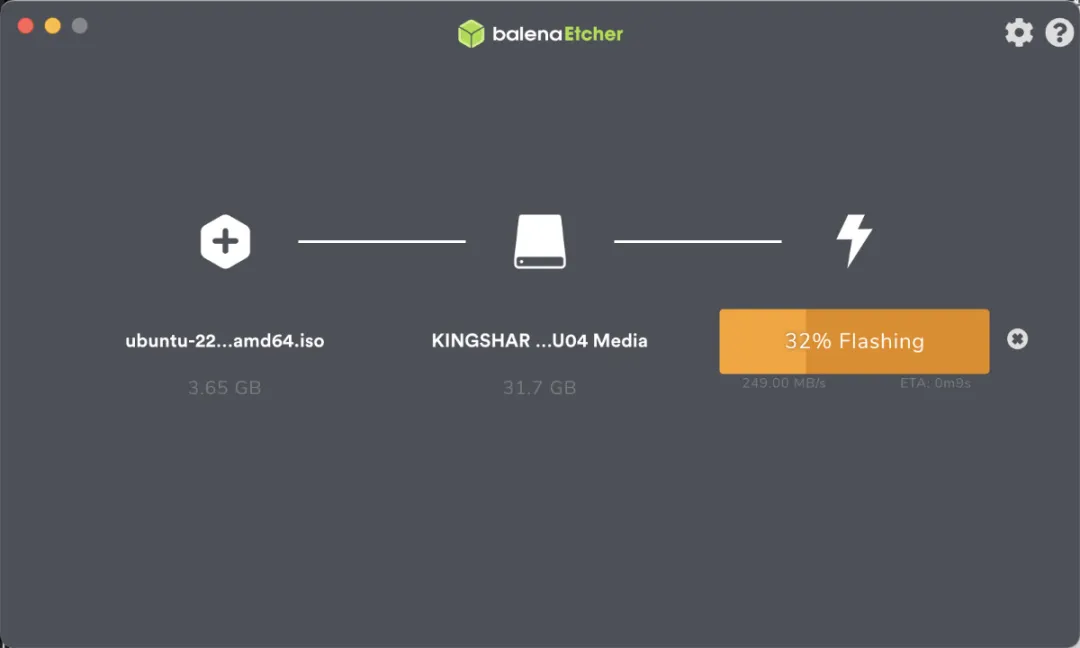
2.制作系統安裝盤
這里使用的是Balena Etcher工具制作系統安裝盤。
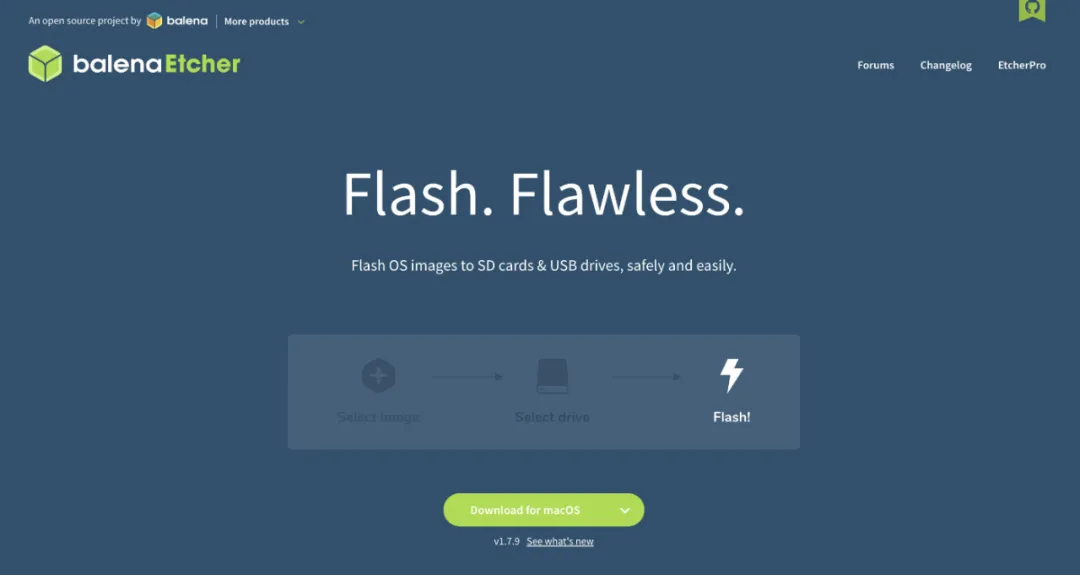
下載完畢軟件之后,打開軟件,選擇我們下載好的系統鏡像,以及要制作成安裝盤的U盤,點擊“制作”按鈕,稍等片刻,安裝盤就制作完成啦。
3.安裝系統
(1) 設置BIOS/UEFI啟動順序
- 重啟計算機,并在啟動畫面出現時按下指定鍵(通常是F2、F10、F12、Del等,具體取決于主板型號)進入BIOS或UEFI設置。
- 尋找“Boot”或“啟動”設置,將USB HDD或包含USB字樣的設備調整為第一啟動項。
- 保存更改并退出,計算機將自動重啟并從U盤啟動。
(2) 啟動并進入安裝界面
- 當看到Ubuntu的Logo出現時,表明系統已成功從U盤啟動。稍作等待,安裝程序將自動加載。
- 加載完畢后,會看到Ubuntu安裝向導的第一個界面,選擇“Install Ubuntu”。
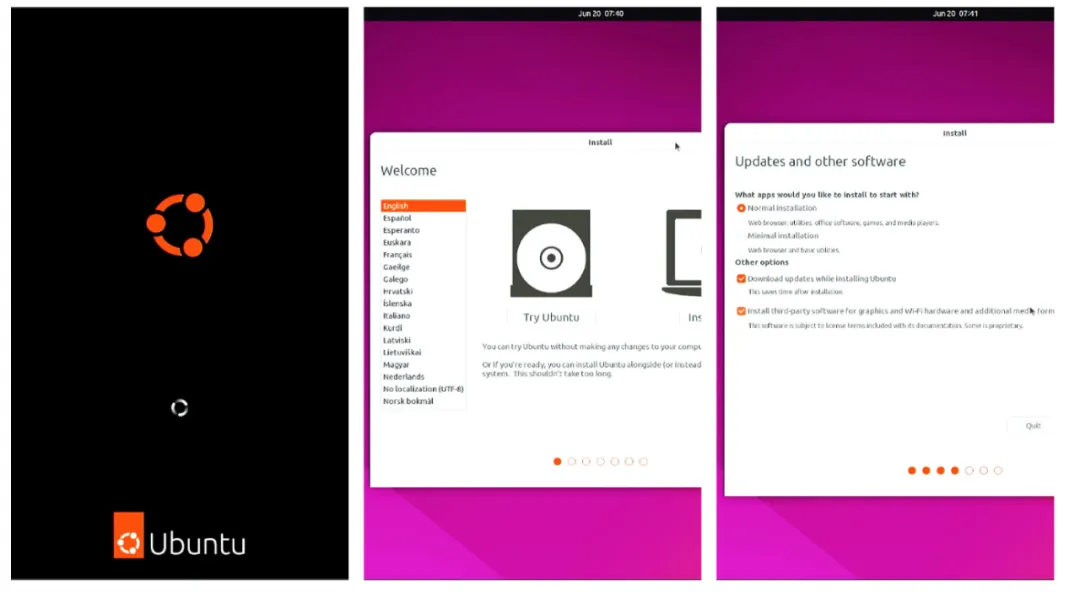
(3) 安裝過程中的額外驅動選項
在安裝過程中,安裝程序可能會檢測到您的系統可能需要額外的硬件驅動,尤其是對于Nvidia顯卡等。這時,您會看到一個詢問是否安裝第三方軟件(包括MP3編解碼器、Flash插件以及專有硬件驅動)的選項。如果不確定,建議勾選此選項,以確保安裝后系統能立即識別并充分利用所有硬件功能。
(4) 等待安裝完成
- 點擊“Continue”開始安裝過程,這可能需要一段時間,請耐心等待。
- 安裝結束后,您會被提示重啟系統。移除U盤,點擊“Restart Now”。
重啟后,將直接進入新安裝的Ubuntu系統登錄界面,使用之前設置的用戶名和密碼登錄。
二、系統基礎環境配置
安裝完Ubuntu系統后的首要任務之一就是進行系統更新,以確保系統擁有最新的安全補丁、軟件包升級和 bug 修復。
sudo apt update && sudo apt -y upgrade如果覺得更新軟件速度太慢,可以換國內鏡像源,如清華大學鏡像源。
sudo sed -i -e "s/cn.archive.ubuntu.com/mirrors.tuna.tsinghua.edu.cn/" /etc/apt/sources.list
sudo sed -i -e "s/security.ubuntu.com/mirrors.tuna.tsinghua.edu.cn/" /etc/apt/sources.list
等待軟件和系統補丁更新完畢之后,執行重啟操作,讓補丁生效即可(首次更新,會更新內核)。
sudo reboot安裝 OpenSSH Server
不論是選擇桌面版操作系統,還是選擇服務端操作系統,默認情況下系統中不會包含 openssh-server 這個組件,如果有從局域網其他設備訪問這臺Linux設備的需求,可以先執行下面的命令,來安裝它。
sudo apt update && sudo apt install -y openssh-server程序安裝完畢后即可執行ssh username@host-ip訪問Linux服務器。如果要登錄Linux使用的設備的用戶名和Linux允許登錄的用戶名一致,則可省略 “username”。
ssh 10.11.12.240

The authenticity of host '10.11.12.240 (10.11.12.240)' can't be established.
ED25519 key fingerprint is SHA256:cYodQ6Chywyna1JbHWfA7XAFonHKAz48cPmjRyVOCFU.
This key is not known by any other names
Are you sure you want to continue connecting (yes/no/[fingerprint])? yes
Warning: Permanently added '10.11.12.240' (ED25519) to the list of known hosts.
soulteary@10.11.12.240's password:
首次登錄的時候,需要先輸入yes讓當前的設備信任目標設備的指紋,然后輸入密碼,就能夠看到熟悉的終端提示信息了:
Welcome to Ubuntu 22.04 LTS (GNU/Linux 5.15.0-25-generic x86_64)

 * Documentation:  https://help.ubuntu.com
 * Management:     https://landscape.canonical.com
 * Support:        https://ubuntu.com/advantage

189 updates can be applied immediately.
73 of these updates are standard security updates.
To see these additional updates run: apt list --upgradable


The programs included with the Ubuntu system are free software;
the exact distribution terms for each program are described in the
individual files in /usr/share/doc/*/copyright.

Ubuntu comes with ABSOLUTELY NO WARRANTY, to the extent permitted by
applicable law.
三、安裝顯卡驅動
可以通過 nvidia-detector 來獲取最新的穩定版本的驅動。
# nvidia-detector
nvidia-driver-525
在安裝驅動之前,暫時是不能使用 nvidia-smi 管理工具的。
# nvidia-smi
zsh: command not found: nvidia-smi
安裝驅動時,建議除了安裝 nvidia-driver 驅動,可以順帶安裝 nvidia-dkms ,方便后續如果需要升降級內核的時候,減少不必要的麻煩:
sudo apt-get install -y nvidia-driver-525 nvidia-dkms-525完成驅動安裝之后,再次執行nvidia-smi,就可以進行顯卡管理啦。
# nvidia-smi

Tue Mar 21 22:53:37 2023
+-----------------------------------------------------------------------------+
| NVIDIA-SMI 525.85.05    Driver Version: 525.85.05    CUDA Version: 12.0     |
|-------------------------------+----------------------+----------------------+
| GPU  Name        Persistence-M| Bus-Id        Disp.A | Volatile Uncorr. ECC |
| Fan  Temp  Perf  Pwr:Usage/Cap|         Memory-Usage | GPU-Util  Compute M. |
|                               |                      |               MIG M. |
|===============================+======================+======================|
|   0  NVIDIA GeForce ...  Off  | 00000000:01:00.0  On |                  Off |
| 31%   34C    P8    19W / 450W |     53MiB / 24564MiB |      0%      Default |
|                               |                      |                  N/A |
+-------------------------------+----------------------+----------------------+

+-----------------------------------------------------------------------------+
| Processes:                                                                  |
|  GPU   GI   CI        PID   Type   Process name                  GPU Memory |
|        ID   ID                                                   Usage      |
|=============================================================================|
|    0   N/A  N/A      1331      G   /usr/lib/xorg/Xorg                 36MiB |
|    0   N/A  N/A      1552      G   /usr/bin/gnome-shell               15MiB |
+-----------------------------------------------------------------------------+
四、GPU Docker環境的安裝和配置
1.宿主機Docker基礎環境安裝
參考Docker官方文檔,進行Docker的快速安裝配置,確保Docker服務運行正常。
(1) 使用apt remove命令移除可能存在的舊版Docker相關軟件包,避免沖突。
sudo apt remove -y docker docker-engine docker.io containerd runc(2) 安裝必要的系統工具和庫,如ca-certificates、curl、gnupg和lsb-release。
sudo apt install -y ca-certificates curl gnupg lsb-release(3) 下載軟件包簽名使用的 GPG 密鑰,并配置系統信任該密鑰。
sudo mkdir -p /etc/apt/keyrings
curl -fsSL https://download.docker.com/linux/ubuntu/gpg | sudo gpg --dearmor -o /etc/apt/keyrings/docker.gpg
sudo chmod a+r /etc/apt/keyrings/docker.gpg
如果無法訪問官方地址,可以將密鑰下載地址替換為下面的地址。
# 清華源
https://mirrors.tuna.tsinghua.edu.cn/docker-ce/linux/ubuntu/gpg
# 阿里云
https://mirrors.aliyun.com/docker-ce/linux/ubuntu/gpg
(4) 創建一個適合于當前 CPU 架構和系統版本的軟件源。
echo \
  "deb [arch=$(dpkg --print-architecture) signed-by=/etc/apt/keyrings/docker.gpg] https://download.docker.com/linux/ubuntu \
  $(lsb_release -cs) stable" | sudo tee /etc/apt/sources.list.d/docker.list > /dev/null
同樣的,如果希望能夠更快的下載到軟件,可以配置軟件源來替換官方地址。
# 清華源
echo \
  "deb [arch=$(dpkg --print-architecture) signed-by=/etc/apt/keyrings/docker.gpg] https://mirrors.tuna.tsinghua.edu.cn/docker-ce/linux/ubuntu/ \
  $(lsb_release -cs) stable" | sudo tee /etc/apt/sources.list.d/docker.list > /dev/null

# 阿里云
echo \
  "deb [arch=$(dpkg --print-architecture) signed-by=/etc/apt/keyrings/docker.gpg] https://mirrors.aliyun.com/docker-ce/linux/ubuntu/ \
  $(lsb_release -cs) stable" | sudo tee /etc/apt/sources.list.d/docker.list > /dev/null
最后一步,就是安裝 Docker 的社區版,以及常用的CLI命令。
sudo apt update && sudo apt install -y docker-ce docker-ce-cli containerd.io docker-compose-plugin2.安裝Docker顯卡運行時
想要在Docker中能夠“調用顯卡”,需要安裝“NVIDIA容器工具包存儲庫”。
distribution=ubuntu22.04 && \
curl -fsSL https://nvidia.github.io/libnvidia-container/gpgkey | sudo gpg --dearmor -o /usr/share/keyrings/nvidia-container-toolkit-keyring.gpg && \
curl -s -L https://nvidia.github.io/libnvidia-container/$distribution/libnvidia-container.list | sed 's#deb https://#deb [signed-by=/usr/share/keyrings/nvidia-container-toolkit-keyring.gpg] https://#g' | sudo tee /etc/apt/sources.list.d/nvidia-container-toolkit.list
命令執行完畢之后,系統中就添加好了Lib Nvidia Container工具的軟件源,然后更新系統軟件列表,使用命令安裝 nvidia-container-toolkit 即可:
sudo apt-get update && sudo apt-get install -y nvidia-container-toolkit完成 nvidia-container-toolkit 的安裝之后,繼續執行nvidia-ctk runtime configure命令,為Docker添加nvidia運行時。完成后,我們的應用就能在容器中使用顯卡資源了:
sudo nvidia-ctk runtime configure --runtime=docker命令執行成功,將看到類似下面的日志輸出:
# sudo nvidia-ctk runtime configure --runtime=docker

INFO[0000] Loading docker config from /etc/docker/daemon.json
INFO[0000] Successfully loaded config
INFO[0000] Flushing docker config to /etc/docker/daemon.json
INFO[0000] Successfully flushed config
INFO[0000] Wrote updated config to /etc/docker/daemon.json
INFO[0000] It is recommended that the docker daemon be restarted.
在完成配置之后,重啟 docker 服務,讓配置生效:
sudo systemctl restart docker服務重啟完畢,查看Docker運行時列表,能夠看到 nvidia 已經生效。
# docker info | grep Runtimes

 Runtimes: nvidia runc io.containerd.runc.v2
五、安裝AI相關Docker鏡像并使用
相比較直接安裝和配置深度學習應用所需要的環境,通過Docker,可以下載到各種具備不同能力的“開箱即用”的環境,通常可以從下面三個地址獲取基礎鏡像:
- https://catalog.ngc.nvidia.com/containers
- https://hub.docker.com/u/nvidia
- https://hub.docker.com/u/pytorch
諸如在RTX 4090這類卡剛發布后,相比較自己從零到一構建鏡像,官方鏡像是個不錯的額外選項,能夠更好發揮顯卡性能,還不需要折騰。
舉個例子,如果想使用最新的CUDA版本,搭配一個能開箱即用的 PyTorch 環境,而此時 Conda 社區還未做兼容適配,最好的選擇不是去翻不同軟件包社區,做一些Hack完成安裝,而是直接使用官方的鏡像。
比如,一條命令,就能夠啟動一個包含了最新版本的 CUDA 和 PyTorch 的實驗環境(環境的發布文檔):
docker run --gpus all -it --rm nvcr.io/nvidia/pytorch:23.02-py3當然,也可以調整命令,比如執行nvidia-smi來檢查運行環境以及獲取顯卡的狀態:
# docker run --gpus all -it --rm nvcr.io/nvidia/pytorch:23.02-py3 nvidia-smi

=============
== PyTorch ==
=============

NVIDIA Release 23.02 (build 53420872)
PyTorch Version 1.14.0a0+44dac51

Container image Copyright (c) 2023, NVIDIA CORPORATION & AFFILIATES. All rights reserved.

Copyright (c) 2014-2023 Facebook Inc.
Copyright (c) 2011-2014 Idiap Research Institute (Ronan Collobert)
Copyright (c) 2012-2014 Deepmind Technologies    (Koray Kavukcuoglu)
Copyright (c) 2011-2012 NEC Laboratories America (Koray Kavukcuoglu)
Copyright (c) 2011-2013 NYU                      (Clement Farabet)
Copyright (c) 2006-2010 NEC Laboratories America (Ronan Collobert, Leon Bottou, Iain Melvin, Jason Weston)
Copyright (c) 2006      Idiap Research Institute (Samy Bengio)
Copyright (c) 2001-2004 Idiap Research Institute (Ronan Collobert, Samy Bengio, Johnny Mariethoz)
Copyright (c) 2015      Google Inc.
Copyright (c) 2015      Yangqing Jia
Copyright (c) 2013-2016 The Caffe contributors
All rights reserved.

Various files include modifications (c) NVIDIA CORPORATION & AFFILIATES.  All rights reserved.

This container image and its contents are governed by the NVIDIA Deep Learning Container License.
By pulling and using the container, you accept the terms and conditions of this license:
https://developer.nvidia.com/ngc/nvidia-deep-learning-container-license

NOTE: The SHMEM allocation limit is set to the default of 64MB.  This may be
   insufficient for PyTorch.  NVIDIA recommends the use of the following flags:
   docker run --gpus all --ipc=host --ulimit memlock=-1 --ulimit stack=67108864 ...

Tue Mar 21 15:30:19 2023
+-----------------------------------------------------------------------------+
| NVIDIA-SMI 525.85.05    Driver Version: 525.85.05    CUDA Version: 12.0     |
|-------------------------------+----------------------+----------------------+
| GPU  Name        Persistence-M| Bus-Id        Disp.A | Volatile Uncorr. ECC |
| Fan  Temp  Perf  Pwr:Usage/Cap|         Memory-Usage | GPU-Util  Compute M. |
|                               |                      |               MIG M. |
|===============================+======================+======================|
|   0  NVIDIA GeForce ...  Off  | 00000000:01:00.0  On |                  Off |
| 31%   33C    P0    33W / 450W |    174MiB / 24564MiB |      5%      Default |
|                               |                      |                  N/A |
+-------------------------------+----------------------+----------------------+

+-----------------------------------------------------------------------------+
| Processes:                                                                  |
|  GPU   GI   CI        PID   Type   Process name                  GPU Memory |
|        ID   ID                                                   Usage      |
|=============================================================================|
+-----------------------------------------------------------------------------+
在上面的命令中,雖然調用了顯卡,但是輸出的日志中提醒并行計算需要的緩存是不足的。為了最佳的性能實現,可以繼續調整命令如下:
docker run --gpus all --ipc=host --ulimit memlock=-1 --ulimit stack=67108864 -it --rm nvcr.io/nvidia/pytorch:23.02-py3將--gpus all替換為顯卡編號,即可在多卡機器中指定某張卡來運行程序:
docker run --gpus "0" --ipc=host --ulimit memlock=-1 --ulimit stack=67108864 -it --rm nvcr.io/nvidia/pytorch:23.02-py3如果希望八卡的機器只有單數卡能夠被容器訪問,可以調整參數為:
--gpus "1,3,5,7"