有Redis為什么還要本地緩存?談談你對本地緩存的理解?
本地緩存是將數據存儲在應用程序所在的本地內存中的緩存方式。既然,已經有了 Redis 可以實現分布式緩存了,為什么還需要本地緩存呢?接下來,我們一起來看。
為什么需要本地緩存?
盡管已經有 Redis 緩存了,但本地緩存也是非常有必要的,因為它有以下優點:
- 速度優勢:本地緩存直接利用本地內存,訪問速度非常快,能夠顯著降低數據訪問延遲。
- 減少網絡開銷:使用本地緩存可以減少與遠程緩存(如 Redis)之間的數據交互,從而降低網絡 I/O 開銷。
- 降低服務器壓力:本地緩存能夠分擔服務器的數據訪問壓力,提高系統的整體穩定性。
因此,在生產環境中,我們通常使用本地緩存+Redis 緩存一起組合成多級緩存,來共同保證程序的運行效率。
多級緩存
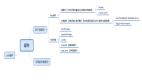
多級緩存是一種緩存架構策略,它使用多個層次的緩存來存儲數據,以提高數據訪問速度和系統性能,最簡單的多級緩存就是由本地緩存 + Redis 分布式緩存組成的,如圖所示:
 圖片
圖片
多級緩存在獲取時的實現代碼如下:
public Object getFromCache(String key) {
    // 先從本地緩存中查找
    Cache.ValueWrapper localCacheValue = cacheManager.getCache("localCache").get(key);
    if (localCacheValue!= null) {
        return localCacheValue.get();
    }
    // 如果本地緩存未命中,從 Redis 中查找
    Object redisValue = redisTemplate.opsForValue().get(key);
    if (redisValue!= null) {
        // 將 Redis 中的數據放入本地緩存
        cacheManager.getCache("localCache").put(key, redisValue);
        return redisValue;
    }
    return null;
}
本地緩存的實現
本地緩存常見的方式實現有以下幾種:
- Ehcache
- Caffeine
- Guava Cache
它們的基本使用如下。
1.Ehcache
1.1 添加依賴
在 pom.xml 文件中添加 Ehcache 依賴:
<dependency>
  <groupId>org.springframework.boot</groupId>
  <artifactId>spring-boot-starter-cache</artifactId>
</dependency>
<dependency>
  <groupId>org.ehcache</groupId>
  <artifactId>ehcache</artifactId>
</dependency>
1.2 配置 Ehcache
在 src/main/resources 目錄下創建 ehcache.xml 文件:
<ehcache xmlns:xsi="http://www.w3.org/2001/XMLSchema-instance"
  xsi:noNamespaceSchemaLocation="http://www.ehcache.org/ehcache.xsd">
  <cache name="myCache"
    maxEntriesLocalHeap="1000"
    eternal="false"
    timeToIdleSeconds="120"
    timeToLiveSeconds="120"/>
</ehcache>
1.3 啟用緩存
在 Spring Boot 應用的主類或配置類上添加 @EnableCaching 注解:
import org.springframework.boot.SpringApplication;
import org.springframework.boot.autoconfigure.SpringBootApplication;
import org.springframework.cache.annotation.EnableCaching;

@SpringBootApplication
@EnableCaching
public class CacheApplication {
    public static void main(String[] args) {
        SpringApplication.run(CacheApplication.class, args);
    }
}
1.4 使用緩存
創建一個服務類并使用 @Cacheable 注解:
import org.springframework.cache.annotation.Cacheable;
import org.springframework.stereotype.Service;

@Service
public class MyService {

    @Cacheable(value = "myCache", key = "#id")
    public String getData(String id) {
        // 模擬耗時操作
        try {
            Thread.sleep(1000);
        } catch (InterruptedException e) {
            e.printStackTrace();
        }
        return "Data for " + id;
    }
}
2.Caffeine
2.1 添加依賴
在 pom.xml 文件中添加 Caffeine 依賴:
<dependency>
  <groupId>org.springframework.boot</groupId>
  <artifactId>spring-boot-starter-cache</artifactId>
</dependency>
<dependency>
  <groupId>com.github.ben-manes.caffeine</groupId>
  <artifactId>caffeine</artifactId>
</dependency>
2.2 啟用緩存
在 Spring Boot 應用的主類或配置類上添加 @EnableCaching 注解:
import org.springframework.boot.SpringApplication;
import org.springframework.boot.autoconfigure.SpringBootApplication;
import org.springframework.cache.annotation.EnableCaching;

@SpringBootApplication
@EnableCaching
public class CacheApplication {
    public static void main(String[] args) {
        SpringApplication.run(CacheApplication.class, args);
    }
}
2.3 配置 Caffeine 緩存
創建一個配置類來配置 Caffeine 緩存:
import com.github.benmanes.caffeine.cache.Caffeine;
import org.springframework.cache.CacheManager;
import org.springframework.cache.caffeine.CaffeineCacheManager;
import org.springframework.context.annotation.Bean;
import org.springframework.context.annotation.Configuration;

@Configuration
public class CacheConfig {

    @Bean
    public CacheManager cacheManager() {
        CaffeineCacheManager cacheManager = new CaffeineCacheManager("myCache");
        cacheManager.setCaffeine(Caffeine.newBuilder()
                                 .maximumSize(1000)
                                 .expireAfterWrite(120, TimeUnit.SECONDS));
        return cacheManager;
    }
}
2.4 使用緩存
創建一個服務類并使用 @Cacheable 注解:
import org.springframework.cache.annotation.Cacheable;
import org.springframework.stereotype.Service;

@Service
public class MyService {

    @Cacheable(value = "myCache", key = "#id")
    public String getData(String id) {
        // 模擬耗時操作
        try {
            Thread.sleep(1000);
        } catch (InterruptedException e) {
            e.printStackTrace();
        }
        return "Data for " + id;
    }
}
3.Guava Cache
3.1 添加依賴
在 pom.xml 文件中添加 Guava 依賴:
<dependency>
  <groupId>org.springframework.boot</groupId>
  <artifactId>spring-boot-starter-cache</artifactId>
</dependency>
<dependency>
  <groupId>com.google.guava</groupId>
  <artifactId>guava</artifactId>
</dependency>
3.2 啟用緩存
在 Spring Boot 應用的主類或配置類上添加 @EnableCaching 注解:
import org.springframework.boot.SpringApplication;
import org.springframework.boot.autoconfigure.SpringBootApplication;
import org.springframework.cache.annotation.EnableCaching;

@SpringBootApplication
@EnableCaching
public class CacheApplication {
    public static void main(String[] args) {
        SpringApplication.run(CacheApplication.class, args);
    }
}
3.3 配置 Guava 緩存
創建一個配置類來配置 Guava 緩存:
import com.google.common.cache.CacheBuilder;
import org.springframework.cache.Cache;
import org.springframework.cache.CacheManager;
import org.springframework.cache.concurrent.ConcurrentMapCache;
import org.springframework.cache.concurrent.ConcurrentMapCacheManager;
import org.springframework.context.annotation.Bean;
import org.springframework.context.annotation.Configuration;

import java.util.concurrent.TimeUnit;

@Configuration
public class CacheConfig {

    @Bean
    public CacheManager cacheManager() {
        ConcurrentMapCacheManager cacheManager = new ConcurrentMapCacheManager() {
            @Override
            protected Cache createConcurrentMapCache(String name) {
                return new ConcurrentMapCache(name,
                                              CacheBuilder.newBuilder()
                                              .maximumSize(1000)
                                              .expireAfterWrite(120, TimeUnit.SECONDS)
                                              .build().asMap(), false);
            }
        };
        return cacheManager;
    }
}
3.4 使用緩存
創建一個服務類并使用 @Cacheable 注解:
import org.springframework.cache.annotation.Cacheable;
import org.springframework.stereotype.Service;

@Service
public class MyService {

    @Cacheable(value = "myCache", key = "#id")
    public String getData(String id) {
        // 模擬耗時操作
        try {
            Thread.sleep(1000);
        } catch (InterruptedException e) {
            e.printStackTrace();
        }
        return "Data for " + id;
    }
}
知識擴展:@Cacheable、@CachePut、@CacheEvict
在 Spring 框架中,@Cacheable、@CachePut 和 @CacheEvict 是用于緩存管理的注解,它們的含義如下:
- @Cacheable:用于聲明一個方法的返回值是可以被緩存的。當方法被調用時,Spring Cache 會先檢查緩存中是否存在相應的數據。如果存在,則直接返回緩存中的數據,避免重復執行方法;如果不存在,則執行方法并將返回值存入緩存中。它的使用示例如下:
@Cacheable(value = "users", key = "#id")
public User getUserById(String id) {
// 模擬從數據庫中獲取用戶信息
System.out.println("Fetching user from database: " + id);
return new User(id, "User Name " + id);
}- @CachePut:用于更新緩存中的數據。與 @Cacheable 不同,@CachePut 注解的方法總是會執行,并將返回值更新到緩存中。無論緩存中是否存在相應的數據,該方法都會執行,并將新的數據存入緩存中(如果緩存中已存在數據,則覆蓋它)。它的使用示例如下:
@CachePut(value = "users", key = "#user.id")
public User updateUser(User user) {
// 模擬更新數據庫中的用戶信息
System.out.println("Updating user in database: " + user.getId());
// 假設更新成功
return user;
}- @CacheEvict:用于刪除緩存中的數據。當方法被調用時,指定的緩存項將被刪除。這可以用于清除舊數據或使緩存項失效。它的使用示例如下:
@CacheEvict(value = "users", key = "#id")
public void deleteUser(String id) {
// 模擬從數據庫中刪除用戶信息
System.out.println("Deleting user from database: " + id);
}
// 清除整個緩存,而不僅僅是特定的條目
@CacheEvict(value = "users", allEntries = true)
public void clearAllUsersCache() {
    System.out.println("Clearing all users cache");
}
小結
生產環境通常會使用本地緩存 + Redis 緩存,一起實現多級緩存,以提升程序的運行效率,而本地緩存的常見實現有 Ehcache、Caffeine、Guava Cache 等。然而,凡事有利就有弊,那么多級緩存最大的問題就是數據一致性問題,對于多級緩存的數據一致性問題要如何保證呢?